Friday, November 8, 2013

IMA Fails To Start On XenApp 6.5 with Specific Error Code - 2147483588

Unable to see the server in the Citrix farm after joing it. The IMA service fails with above error and MFcom service was in "starting" status.

Also, you can see these error in Eventlogs -IMA Fails To Start On XenApp 6.5 with Specific Error Code - 2147483588

Solution:


Run the repair on Xenapp from control panel programs

Deselect "Enforce access checks for this application" in Component Services as shown below:

  1. Open the Component Services snap-in (comexp.msc).
  2. Expand Component Services > My Computer > COM+ Applications.
  3. Right-click CitrixLogServer, choose Properties then choose the Security tab.
  4. Deselect the Enforce access checks for this application check box.
Here is the article from Citrix:
http://support.citrix.com/article/CTX134504


Have a nice day!

Failed to load plugin ImaAppSs.dll with error IMA_RESULT_WRITE_TO_LOG_FAILED


Unable to see the server in the Citrix farm after joing it. The IMA service fails with above error and MFcom service was in "starting" status.

Also, you can see these error in Eventlogs -IMA Fails To Start On XenApp 6.5 with Specific Error Code - 2147483588

Solution:


 Run the repair on Xenapp from control panel programs

Deselect "Enforce access checks for this application" in Component Services as shown below:

  1. Open the Component Services snap-in (comexp.msc).
  2. Expand Component Services > My Computer > COM+ Applications.
  3. Right-click CitrixLogServer, choose Properties then choose the Security tab.
  4. Deselect the Enforce access checks for this application check box.
Here is the article from Citrix:
http://support.citrix.com/article/CTX134504


 Have a nice day!

Wednesday, November 6, 2013

Application could not be published in folder: No object found - Citrix XenApp


Error:
Citrix XenApp 6.5

Application could not be published in folder:

No object found

The above error pops up on many reasons and couple of them are here:

1. Check folder permissons
User doesn't have permissions to publish in that folder which causes the error. Providing required permissions to the user will fix the issue.

2. XenApp server - MFcom service error
If MFcom service in "starting" mode:
Stop IMA service (Net stop IMASERVICE)
Recreate the LHC (dsmaint recreateLHC)
Start IMA service (Net start IMASERVICE)
Start MFCOM service

Even, the service fails/hangs, run the repair on xenapp from control panel programs

3. Database had a stale record of XenApp/Data Collector server

In my case, the error occurred because the DB had a stale record of data collector server where I was running Citrix App Center.

Steps to fix it:
1. Take backup of the Database
2. run dscheck commands to clean it. (dscheck /clean)
3. Remove XenApp/DC server from the farm using Xenapp Role Manager. The uninstalling of the Xenapp is not recommended here ( I tried uninstall of Xenapp and it didn't fix my issue).
4. Clean up the Database again using dscheck /clean command
5. Rejoin the Xenapp/DC server to the farm using XenApp Role Manager

Now I am able to successfully publish apps in the farm.

4. Check that your/problemtic user id's member groups. Some cases the user id may be members of both read only admins and full admins groups. You need to remove either group from appcenter console or user id from read only admins group.

Have a nice day!

Tuesday, October 29, 2013

Error: java.lang.nullpointerexception


I have got the error "java.lang.nullpointerexception" when I tried to install Oracle 11g client. It was caused due to unavilability of  folder to write install logs in admin mode.

In my case, it was looking for my home directory to write log files.

Solution:

Run cmd prompt in admin mode
map home directory with teh follwoing command
net use x: \\servername\share\home_folder

Then,
Run Oracle client setup in admin mode.

Have a nice day!

Monday, October 7, 2013

Remote logins disabled after server reboot


This was caused by many reasons. One of the reason was  that when the elected zone data collector server was rebooted, servers that rebooted at that time, couldn't contact the zone master and had logins disabled.
Some one disbale logins manually through Citrix console.

It happens when LHC corrupted.

Solution:

Follow one of these solutions based on your findings

1. Make a preferred zone master and make it its reboot schedule in other time than remaining servers.

2. Enable logins through Citrix console

3. Recreate LHC

4. Create a schedule task with
SCHTASKS /create /tn "OpenCitrixLogon" /TR "cmd /c change logon /enable" /SC daily /RU "NT Authority\System" /ST 06:00 /F

5. Change Registry key through a batch file after reboot. You can also run it through a scheduled task.

HKLM\System\CurrentControlSet\Control\Terminal Server

DWORD = fDenyTSConnections
Value = 0
6. Follow this article
http://support.citrix.com/article/CTX134641

Have a nce day!

Tuesday, September 24, 2013

Friday, September 20, 2013

Deleting CtxVDAIEInterceptorBHO class


Recently I have seen the above plugin in IE on Xenapp servers. I don't need VDA plugin on Xenapp server.
Display name : CtxVDAIEInterceptorBHO Class
File path : C:\Program Files\Common Files\Citrix\System32\VDAIEInterceptor.dll
BHO CLSID : {A44B166E-5097-4b07-8732-BFD924C3CF68}

Here is the process I followed to delete it:

Close all IE sessions
Open cmd prompt in admin mode
Change directory to C:
copy and paste below code.
close cmd prompt.
Open IE and check for plugin. It should not be appeared in IE.


 echo Start
echo #
echo ######################## Default dirctory for x86 x64 ########################
echo #
echo this command is default system32 directory for x86 OS or x64 OS
cd %windir% & cd system32
echo Remove IE BHO 01 & reg delete "HKLM\SOFTWARE\Microsoft\Windows\CurrentVersion\Explorer\Browser Helper Objects\{A44B166E-5097-4b07-8732-BFD924C3CF68}" /f
echo Remove IE BHO 02 & reg delete "HKCU\Software\Microsoft\Windows\CurrentVersion\Ext\Stats\{A44B166E-5097-4b07-8732-BFD924C3CF68}" /f
echo Remove IE BHO 03 & reg delete "HKCU\Software\Microsoft\Windows\CurrentVersion\Ext\Settings\{A44B166E-5097-4b07-8732-BFD924C3CF68}" /f
echo Toolbar delete 01 & reg delete "HKLM\SOFTWARE\Microsoft\Internet Explorer\Toolbar" /v "{A44B166E-5097-4b07-8732-BFD924C3CF68}" /f
echo Toolbar delete 02 & reg delete "HKCU\Software\Microsoft\Internet Explorer\Toolbar\WebBrowser" /v "{A44B166E-5097-4b07-8732-BFD924C3CF68}" /f
echo Toolbar delete 03 & reg delete "HKCU\Software\Microsoft\Internet Explorer\URLSearchHooks" /v "{A44B166E-5097-4b07-8732-BFD924C3CF68}" /f
echo Toolbar delete 04 & reg delete "HKLM\SOFTWARE\Microsoft\Windows\CurrentVersion\Ext\PreApproved\{A44B166E-5097-4b07-8732-BFD924C3CF68}" /f
echo Toolbar delete 05 & reg delete "HKCU\Software\Microsoft\Windows\CurrentVersion\Ext\Stats\{A44B166E-5097-4b07-8732-BFD924C3CF68}" /f
echo CLSID delete & reg delete "HKCR\CLSID\{A44B166E-5097-4b07-8732-BFD924C3CF68}" /f
echo #
echo ######################## Change the dirctory for x64 ########################
echo #
echo this command is x86 application's registry for x64 OS
cd %windir% & cd syswow64
echo Remove IE BHO 01 & reg delete "HKLM\SOFTWARE\Microsoft\Windows\CurrentVersion\Explorer\Browser Helper Objects\{A44B166E-5097-4b07-8732-BFD924C3CF68}" /f
echo Remove IE BHO 02 & reg delete "HKCU\Software\Microsoft\Windows\CurrentVersion\Ext\Stats\{A44B166E-5097-4b07-8732-BFD924C3CF68}" /f
echo Remove IE BHO 03 & reg delete "HKCU\Software\Microsoft\Windows\CurrentVersion\Ext\Settings\{A44B166E-5097-4b07-8732-BFD924C3CF68}" /f
echo Toolbar delete 01 & reg delete "HKLM\SOFTWARE\Microsoft\Internet Explorer\Toolbar" /v "{A44B166E-5097-4b07-8732-BFD924C3CF68}" /f
echo Toolbar delete 02 & reg delete "HKCU\Software\Microsoft\Internet Explorer\Toolbar\WebBrowser" /v "{A44B166E-5097-4b07-8732-BFD924C3CF68}" /f
echo Toolbar delete 03 & reg delete "HKCU\Software\Microsoft\Internet Explorer\URLSearchHooks" /v "{A44B166E-5097-4b07-8732-BFD924C3CF68}" /f
echo Toolbar delete 04 & reg delete "HKLM\SOFTWARE\Microsoft\Windows\CurrentVersion\Ext\PreApproved\{A44B166E-5097-4b07-8732-BFD924C3CF68}" /f
echo Toolbar delete 05 & reg delete "HKCU\Software\Microsoft\Windows\CurrentVersion\Ext\Stats\{A44B166E-5097-4b07-8732-BFD924C3CF68}" /f
echo CLSID delete & reg delete "HKCR\CLSID\{A44B166E-5097-4b07-8732-BFD924C3CF68}" /f
echo End

I have got the above information from the following link: http://windowsvc.com/bbs/board.php?bo_table=windowsvc&wr_id=21231

Have a nice day!

Tuesday, September 17, 2013

A tool for deleting/managing Roaming profiles


Profile corruption makes you to delete roaming profiles in TS environment. TSprofcleaner is a good tool for managing/deleting Roaming profiles in Citrix environment. It is a free tool.

Here is the link: http://ts-admin.com/

Have a nice day!

Friday, August 23, 2013

Change default ICONs in XenAPP publishing


You can easily change ICONs for published apps in XenApp if you have JPG, TIFF, GIF, PNG files. You can convert these image files into ICO files for uploading on published app.

Go to the website http://www.converticon.com/

Click on Browse and select image file

Click on Export and select 32x32 ICO format to save file

It will convert and saves it as ICO file.

Open published application properties and go to shorcut presentation and select Change Icon

In Icon Browser, select "Choose an Icon from a locally browsed file" and replace it with newly created ICO file.

Here is a good article : http://www.coretekservices.com/2012/10/18/how-to-create-nice-looking-icons-for-citrix-published-apps/

Have a nice day!

Monday, August 19, 2013

Do not want display shortcuts on Start menu- Citrix Receiver


If you do not want to display shortcuts on start menu on Citrix workstation where the Reciver was installed,

Open Web Interface PNA agent website propeties of "Mange Shortcuts"

Select Never in "Display" property


Have a nice day!

Tuesday, August 13, 2013

Error 1603 XenApp install failing


XenApp install fails with error 1603. And also you can see this error in Event viewer


Sol:
Note down the V: drive (In your case it might be different drive) mapping in Windows explorer.

1.       Reboot the server

2.       Open CMD prompt as “Run as administrator

3.       Map the drive V: using “net use V:  \\Servername\share” in CMD prompt

4.       Rerun the install from Programs-àCitrixàXenApp server Role Manger -àAdd server Role


Have a nice day!

Friday, August 9, 2013

Citrix Analysis & Audit Tools


There are few tools in google world. Recently I came across these two:

Citrix Scout:


Download it from above link. Unzip it and copy it to Data Collector server.

Run it on Data Collector server.

XenApp Audit Tool:


Install Citrix SDK (Power shell) on Data collector server if it is not installed already. The download path for Xenapp6.5 SDK is
Download XenApp Audit tool from
Unzip XenAppAudit in “Program Files” folder
Run start.bat as administrator

The results will be saved in “Results” folder.
Soem times, you will get errors if your XenApp installation directory is different. In that case modify the Launcher.vbs  to the correct location of the wfshell.exe. Wfshesll.exe is needed to find out the version of XenApp.   In the Launcher.vbs file, you can also modify the path as necessary for the SDK if the SDK installation path is different.

Have a nice day!

Wednesday, July 24, 2013

XenApp Server not accepting connections/Unable to launch your application


Error:

Unable to launch your application. Contact your help desk with the following information: Cannot connect to the Citrix XenApp server. The Citrix XenApp server you have selected is not accepting connections.

There are many reasons:

1. Load Evaluator

Check parameters of load evaluators. Check load on server using command Qfarm /load.

2. DNS/host entries on client side

Check DNS/"Host file" on client systems and verify that you are resolving server names successfully on client workstations.

My situation the client is using host name for name resolution. His host file had wrong entries.

3. Check that the application has been published on right server

4. Verify with firewall team that right ports are opened or not. Do telnet from client work station on 1494 or 2598, 80,443 ports

Ex: telnet serverName 1494
      telnet SerevrIP 1494

if it is successful, you should see ICA

5. Check these articles:

http://support.citrix.com/article/CTX128254

http://support.citrix.com/article/CTX128115

Have a nice day!

Wednesday, July 3, 2013

Move servers between Zones in Citrix 6.5 farm


Its easy to move between zones and the server reboot is required after moving.

Changing Zone mebership:
Go to Zones from console..>.Zone(where serevr located)--->  go to "Election Preference tab" ---> right click on the server and select the Set server's zone membership option to move the selected server to another zone, or select the Change server's zone membership option to move the selected server to another zone.


Changing Election preference of Data Collector:
Go to Zones from console..>.Zone(where server located)---> go to "Election Preference tab" ---> right click on the server and select the Set server's zone election preference option to change the election preference of the server. you can find this option on Data collector servers only.

Have a nice day!

Monday, June 24, 2013

Citrix Printing was not working Xenapp6.5/Printer Auto creation fails with status 0x5


Recently I came across a printing issue farmwide...
Client printers were not mapping. I have enabled client printer mapping policies and Citrix Univesal print driver policies but still client printers were not mapping..

I have solved the issues with the following fixes:

1. Windows printer was selected and grayed out in ICA-TCP properties
Solution: To enable Windows printer I have disabled the "Do not allow Client print redirection" in AD GPO under computer configuration --->Administrative templates-->WIndows components---> Remote Desktop Services-->Remote desktop session host-->Printer redirection

2. Citrix polices the Univer printer driver was not set correct
Solution: I have selected the "use Citrix universal printer if the requested driver is not availble" under user unfiltered policy ---> prnting--> Driver --> Universal print driver usage.

3. Print spooler Service was disabled
Soluton: I have enabled print spooler service and restarted it.

4. Missing Citrix Universal print driver in print server properties
Solution: Installed the Citrix UPD from CD

5. Printer auto creation fails with the status 0x5
Solution: Citrix printing sevice was starting with local account. I have changed the sevice to log on with Local SYSTEM account.

After following the above steps, now I am able to get client printers in Citrix sessions.

Have a nice day!

Wednesday, May 8, 2013

Suppressing Server name pop ups for Receiver installs


There are so many ways:

1. You can supress the server name pop ups for new Receiver client installation by renaming CitrixReceiver.exe as CitrixReceiverWeb.exe. The name is case sensitive. If you install receiver client using "CitrixReceiverWeb.exe", then it doesn't show pop ups for server name.

2. Add "/ALLOWADDSTORE=N" switch while instaling through commandline

3. Changing Registry values post installation to suppress the Add Account window.

Under HKLM\Software\Citrix\Dazzle, set AllowAddStore value to N. Restart Citrix Receiver for Windows to apply the new Registry value.

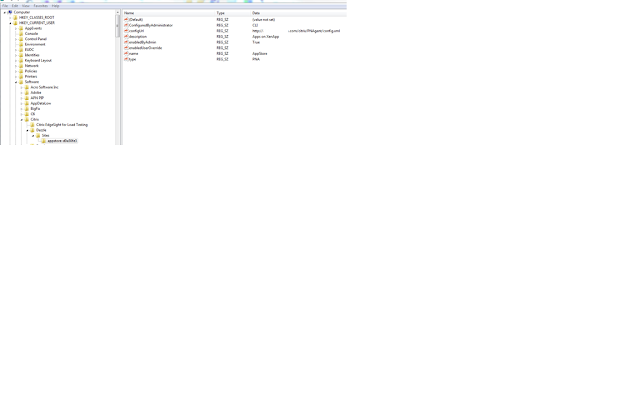
4. Adding the follwoing reg keys under Hkey_Current_User

Have a nice day!


Free Monitoring tool for Citrix Environment/ Control UP


I have gone this free monitoring tool "Control UP" and it is very cool. You can do multiple tasks using this tool along with monitoring Citrix environment.

Check this out:
http://blogs.citrix.com/2011/09/07/controlup/

Download:
http://www.smart-x.com/?CategoryID=276&ArticleID=360&sng=1

Its free for 50 sessions and one controller user.

Have a nice day!

Install receiver client in Command line


If you want push Receiver client in a batch file to end users with WI/Store Front configuration, please use this command:

For Receiver clients less than 3.2 the command for Web Interface configuration will be:

\\shared_location\CitrixReceiver.exe /silent /includeSSON /ALLOWADDSTORE=N INSTALLDIR="C:\Program Files\Citrix" ENABLE_DYNAMIC_CLIENT_NAME=Yes SERVER_LOCATION="http://WIserver.company.com"

ALLOWADDSTORE switch will aloow you enter http address. IF you are using https, then it doesn't require. Keep above command in abatch file and push it to end users with SCCM/some other tool.

For Receiver clients 3.3 or later the command for Web Interface configuration will be:

\\shared_location\CitrixReceiver.exe" /silent /includeSSON /ALLOWADDSTORE=N STORE0="AppStore;http://globalapps.ihess.com/citrix/PNAgent/config.xml;on;Apps on XenApp"


For all client versions the command for storefront configuration will be:

CitrixReceiver.exe /silent  /includeSSON /ALLOWADDSTORE=N STORE0="AppStore;https://testserver.net/Citrix/MyStore/discovery;on;Apps on XenApp"

Please refer article http://support.citrix.com/proddocs/topic/receiver-windows-34/receiver-windows-cfg-command-line.html

Have a nice day!

Friday, March 29, 2013

Citrix Web Interface - Delay on first page


Whenever you restart IIS on WI or WI server, the first page takes one minute to get the Welcome page for first user. All other connections are normal until you restart IIS again.

Work Around:

This issue is caused by a CRL check sent to Verisign. If the Web Interface server cannot access the internet, the CRL check fails and times out.


  1. Check in IIS for the ASP.net version that is in use with the Web Interface site.
    Modify Aspnet.config  in the following directory
    C:\WINDOWS\Microsoft.NET\Framework\v2.0.50727 (If Web Interface uses .Net framework v2.0.50727)


  2. Add the following lines to your ASPNET.CONFIG or APP.CONFIG         
      <*?xml version="1.0" encoding="utf-8"?*>
  <*configuration*>
   <*runtime*>
      <*generatePublisherEvidence enabled="false"/*>
     <*/runtime*>
 <*/configuration*>


Note:  Remove * stars before and after in each line.
The ASPNET.CONFIG file location would be:
c:\Windows\Microsoft.NET\Framework64\v2.0.50727
For a 32-bit application it would be:
c:\Windows\Microsoft.NET\Framework\v2.0.50727

More information Check this article: CTX117273.

Have a nice day!

Friday, March 15, 2013

Automatic Citrix Receiver configuration-Provisioning file


The receiver client on end users  computers can be configured with Store front server's provisioning file. You can generate the Receiver provisioning file from store properties as shown here


Export provisioning file

The export file will be ReceiverConfig.cr. It helps end users to configure they receiver client by double clicking it. Receiver client should be installed before running the file.

Have a nice day!